
Sending triggers via a Serial Port
Note that if you are using PsychoPy version 2022.2 onwards, you may use the serial port component. If you are using an earlier version you will need to use :ref: code components <serial_code>. For both use cases you will need to know your serial port address.
Find out the address of your serial port
Serial port addresses are different depending on whether you’re using a Mac or a Windows device:
If you’re using a Mac
Open a Terminal window and type:
ls dev/tty*
In the terminal window, you’ll see a long list of port names like in the screenshot below:
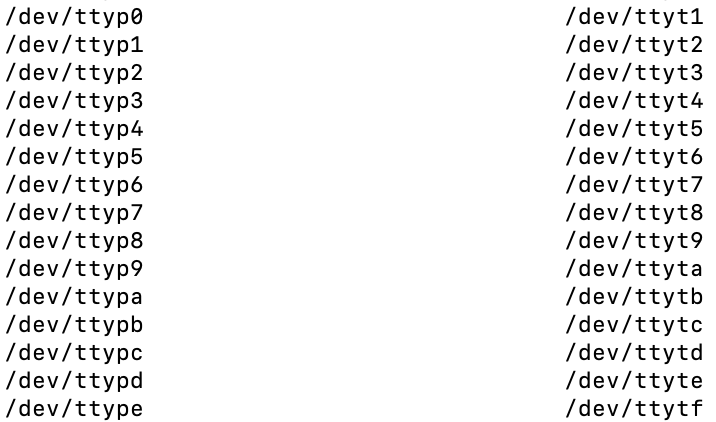
To find out which one your device is connected to, you can remove and replace your device to see which port name is changing.
If you’re using Windows
Open the Device Manager and click on the Ports drop down to show available ports like in the screenshot below:
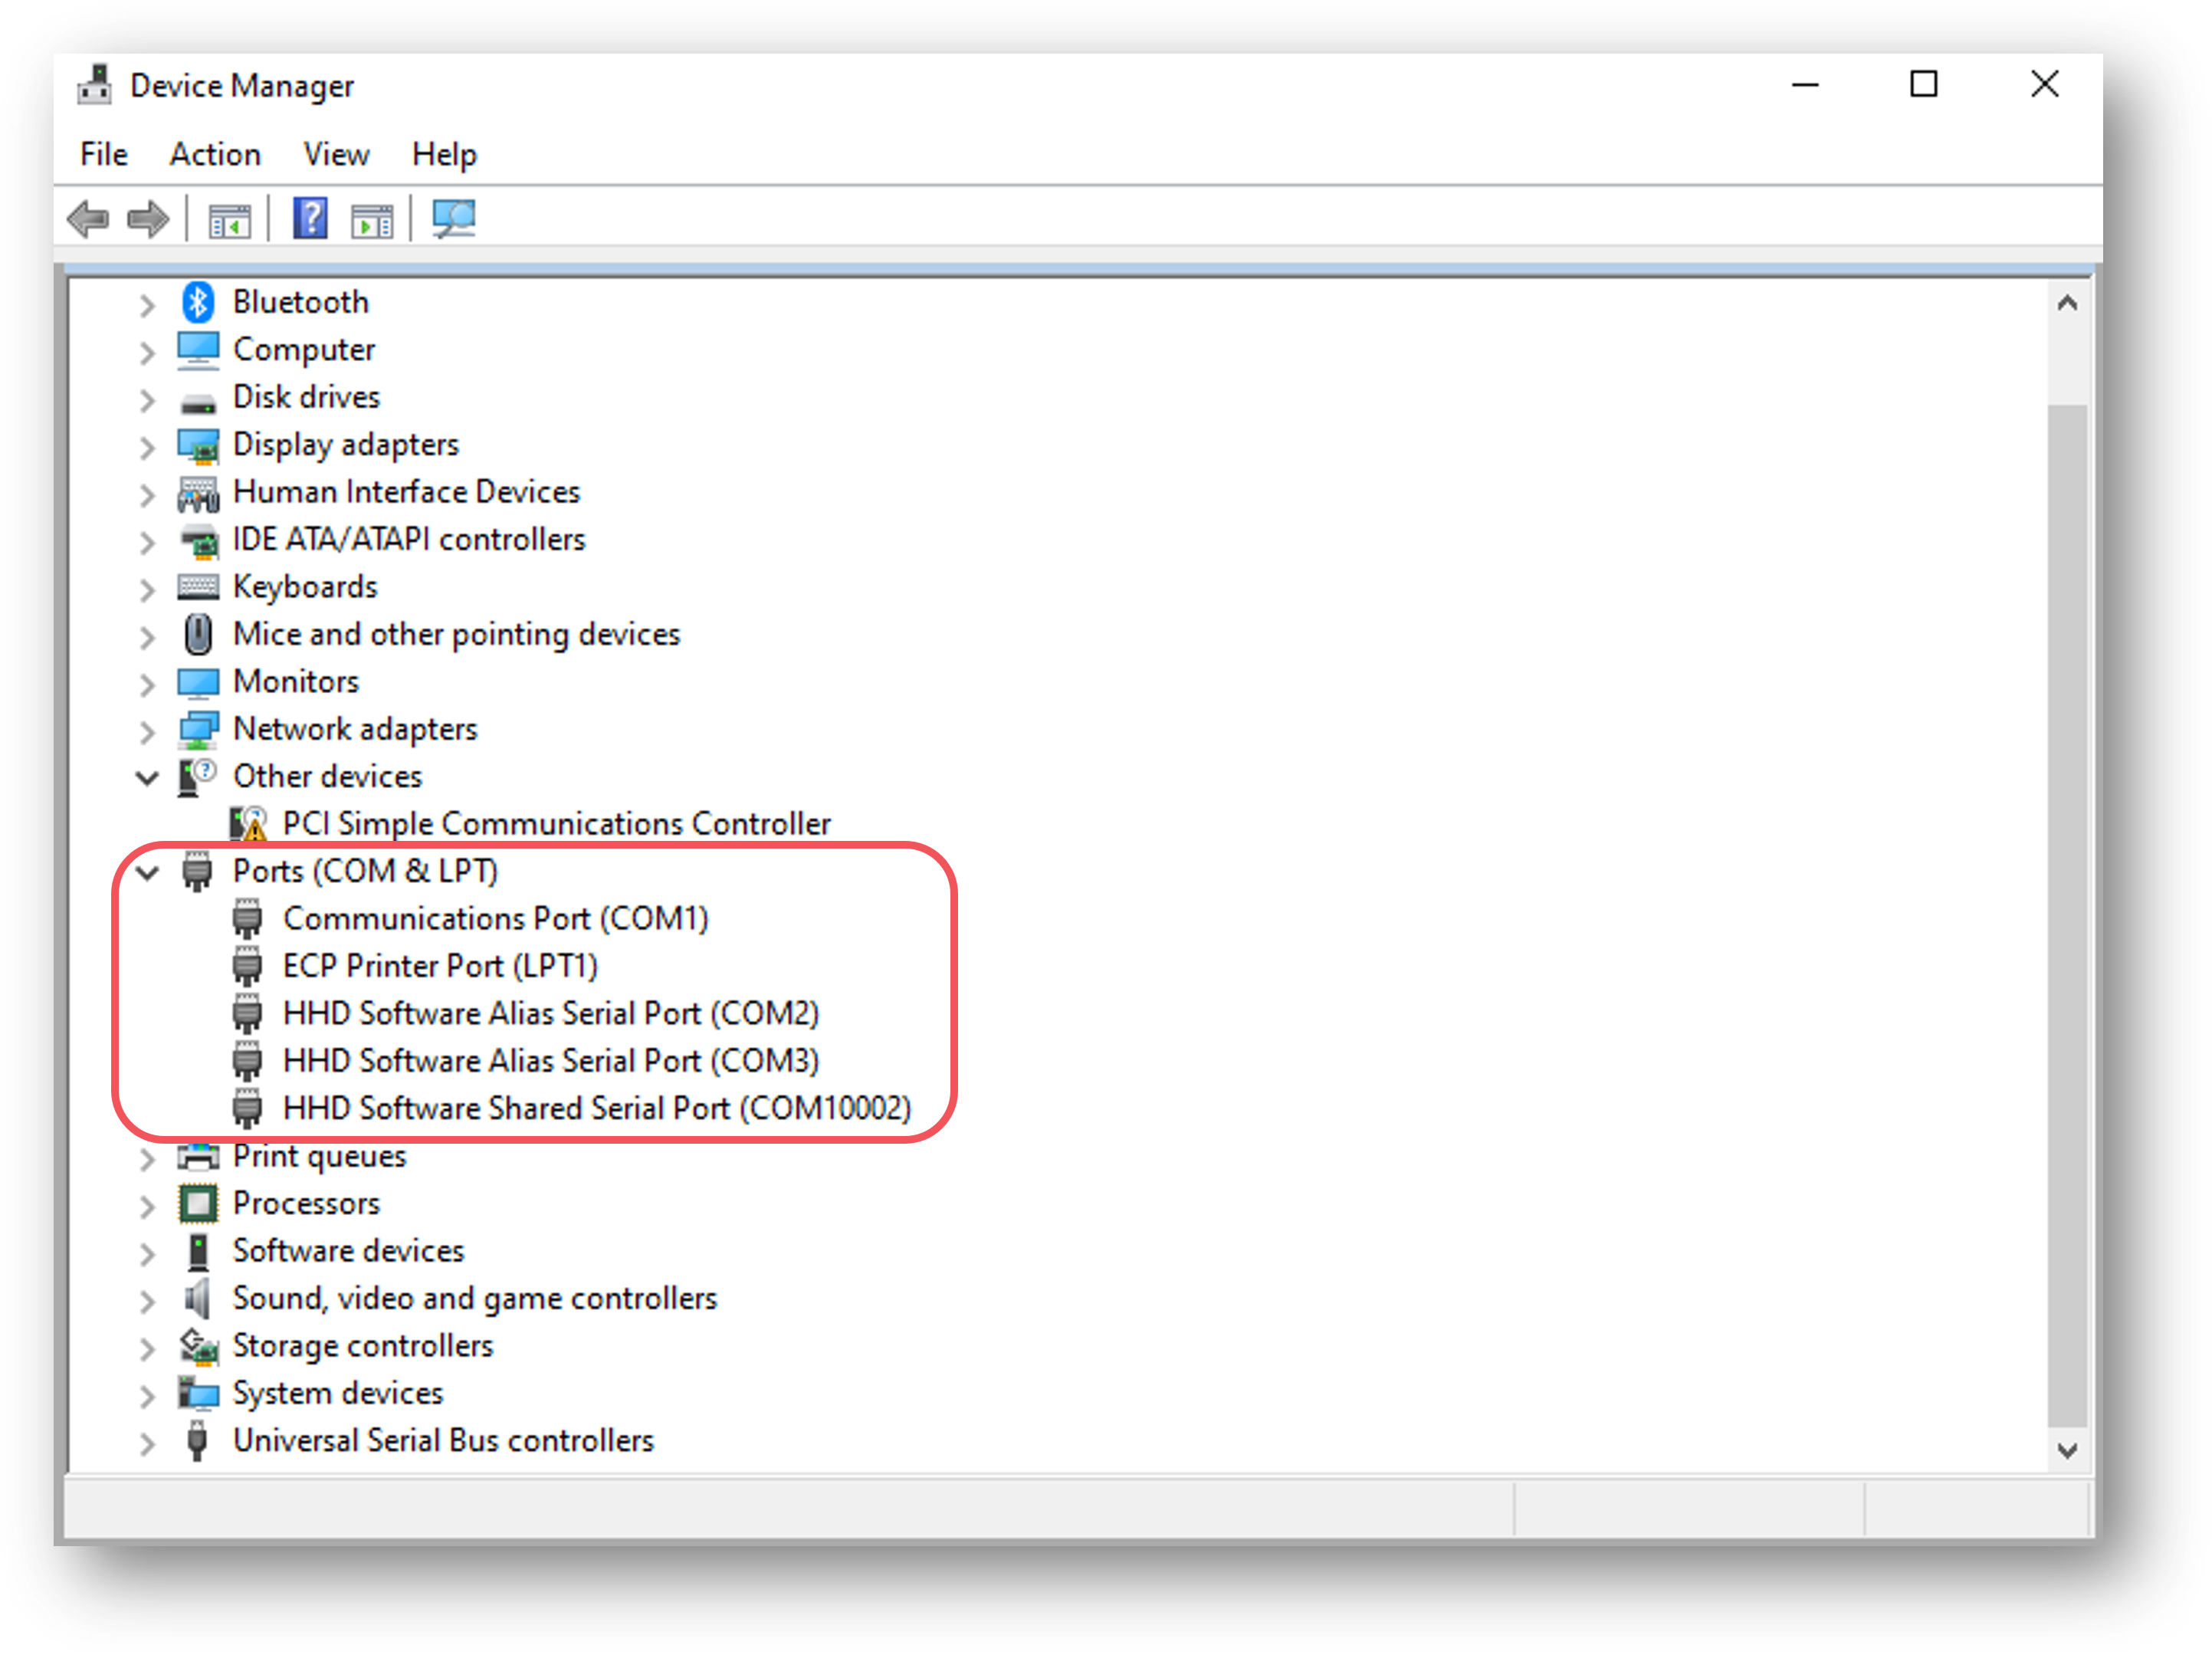
If it’s not obvious which port your device is connected to, remove and replace your device to see which port name changes.
Using a Serial Port Component to communicate via Serial Port
If you’re using PsychoPy version 2022.2 or later, you can use the serial port component. If you’re running an earlier version, you’ll need to use a code component (see :ref: this section <serial_code>).
The serial port component can be found in both the I/O and EEG component drop down menus. Add in a serial port component to the routine that you’d like triggers to be sent from by selecting it from the menu:
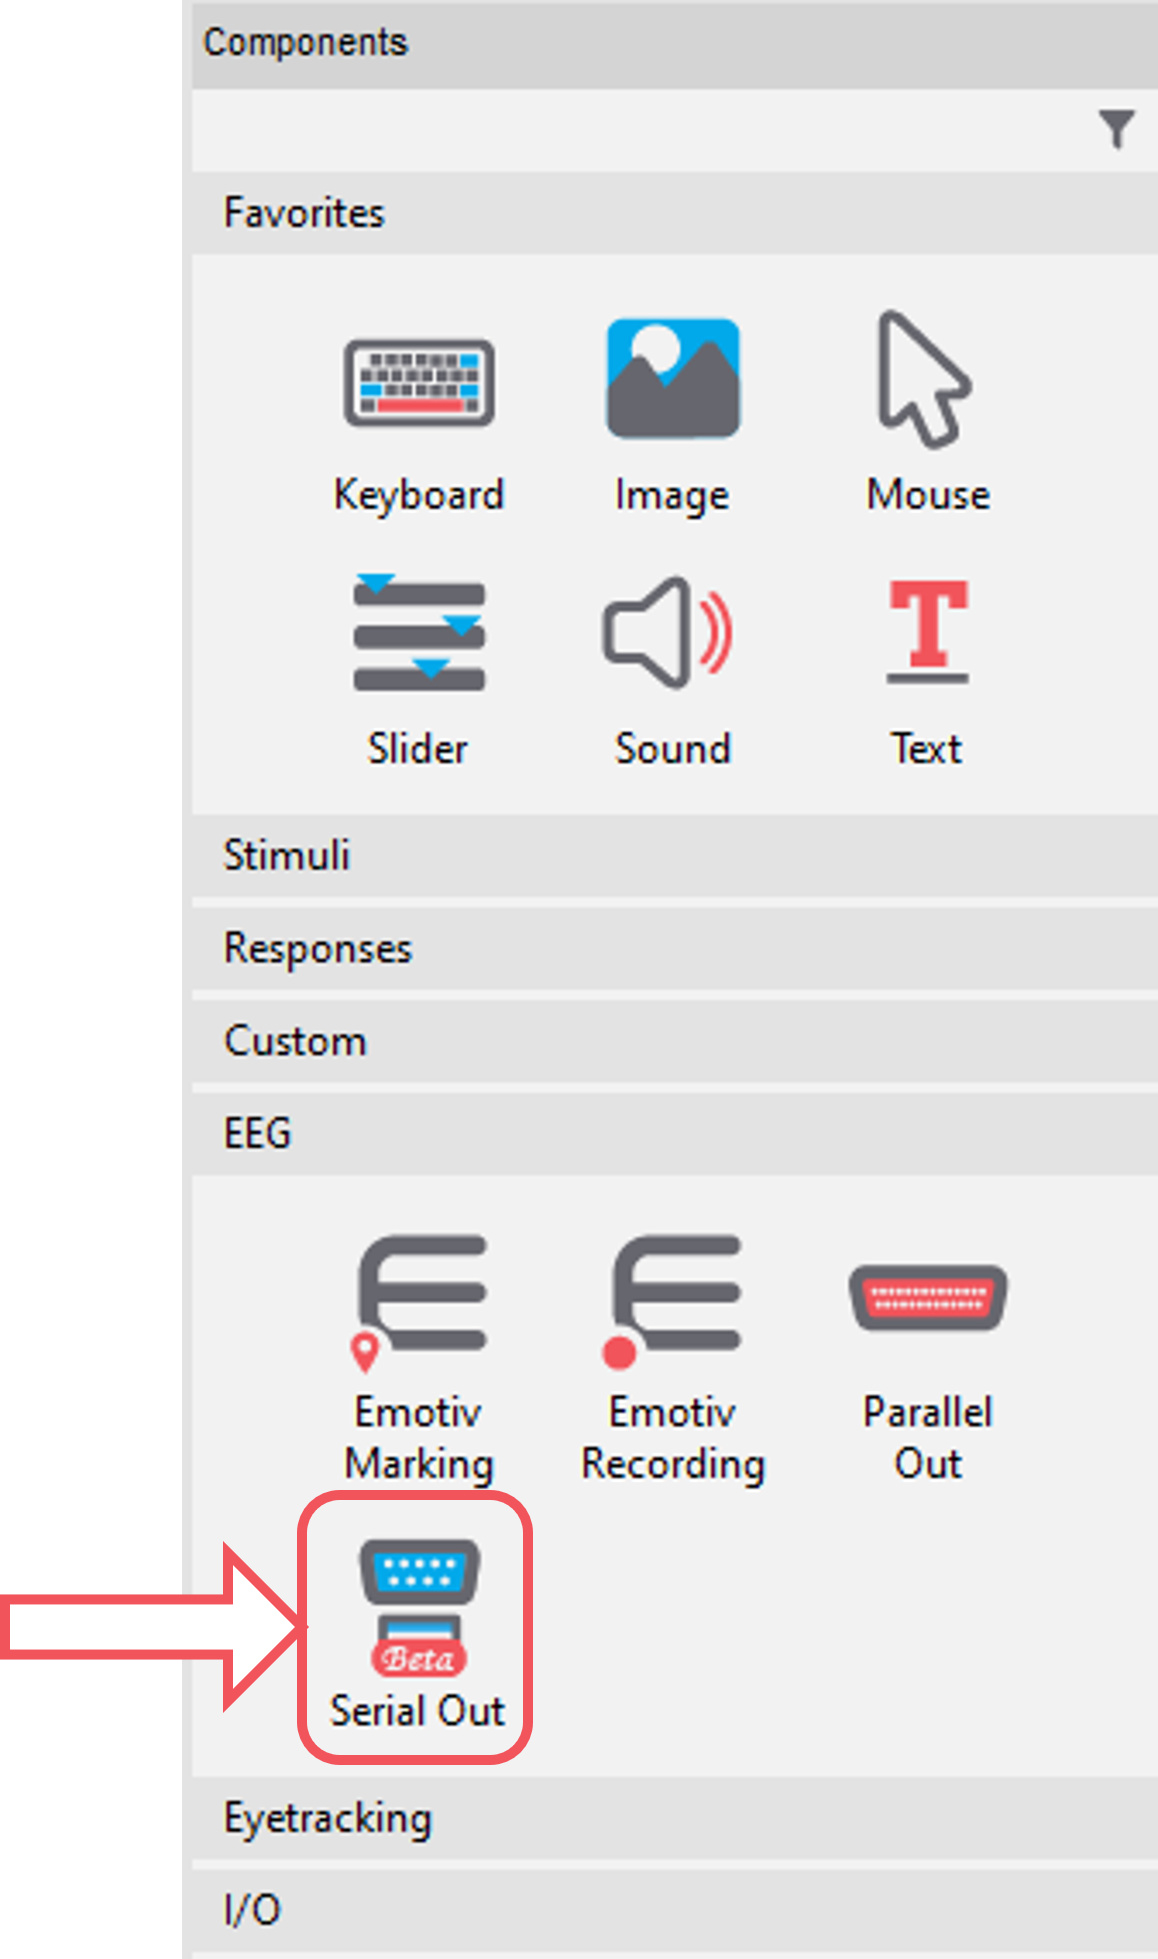
Fig. 35 Select the SerialPort component from the I/O or EEG component drop-down menus.
Now, imagine we want our trigger sent to indicate stimulus onset. We could do this by simply setting the onset time of the trigger to match that of our stimulus. But this is not the most precise way to do this. Also, this doesn’t help us if we want to send our trigger to indicate something with variable timing, such as when a response is made.
For maximum precision, we’ll set the trigger to be sent when the status of our stimulus is set to started:
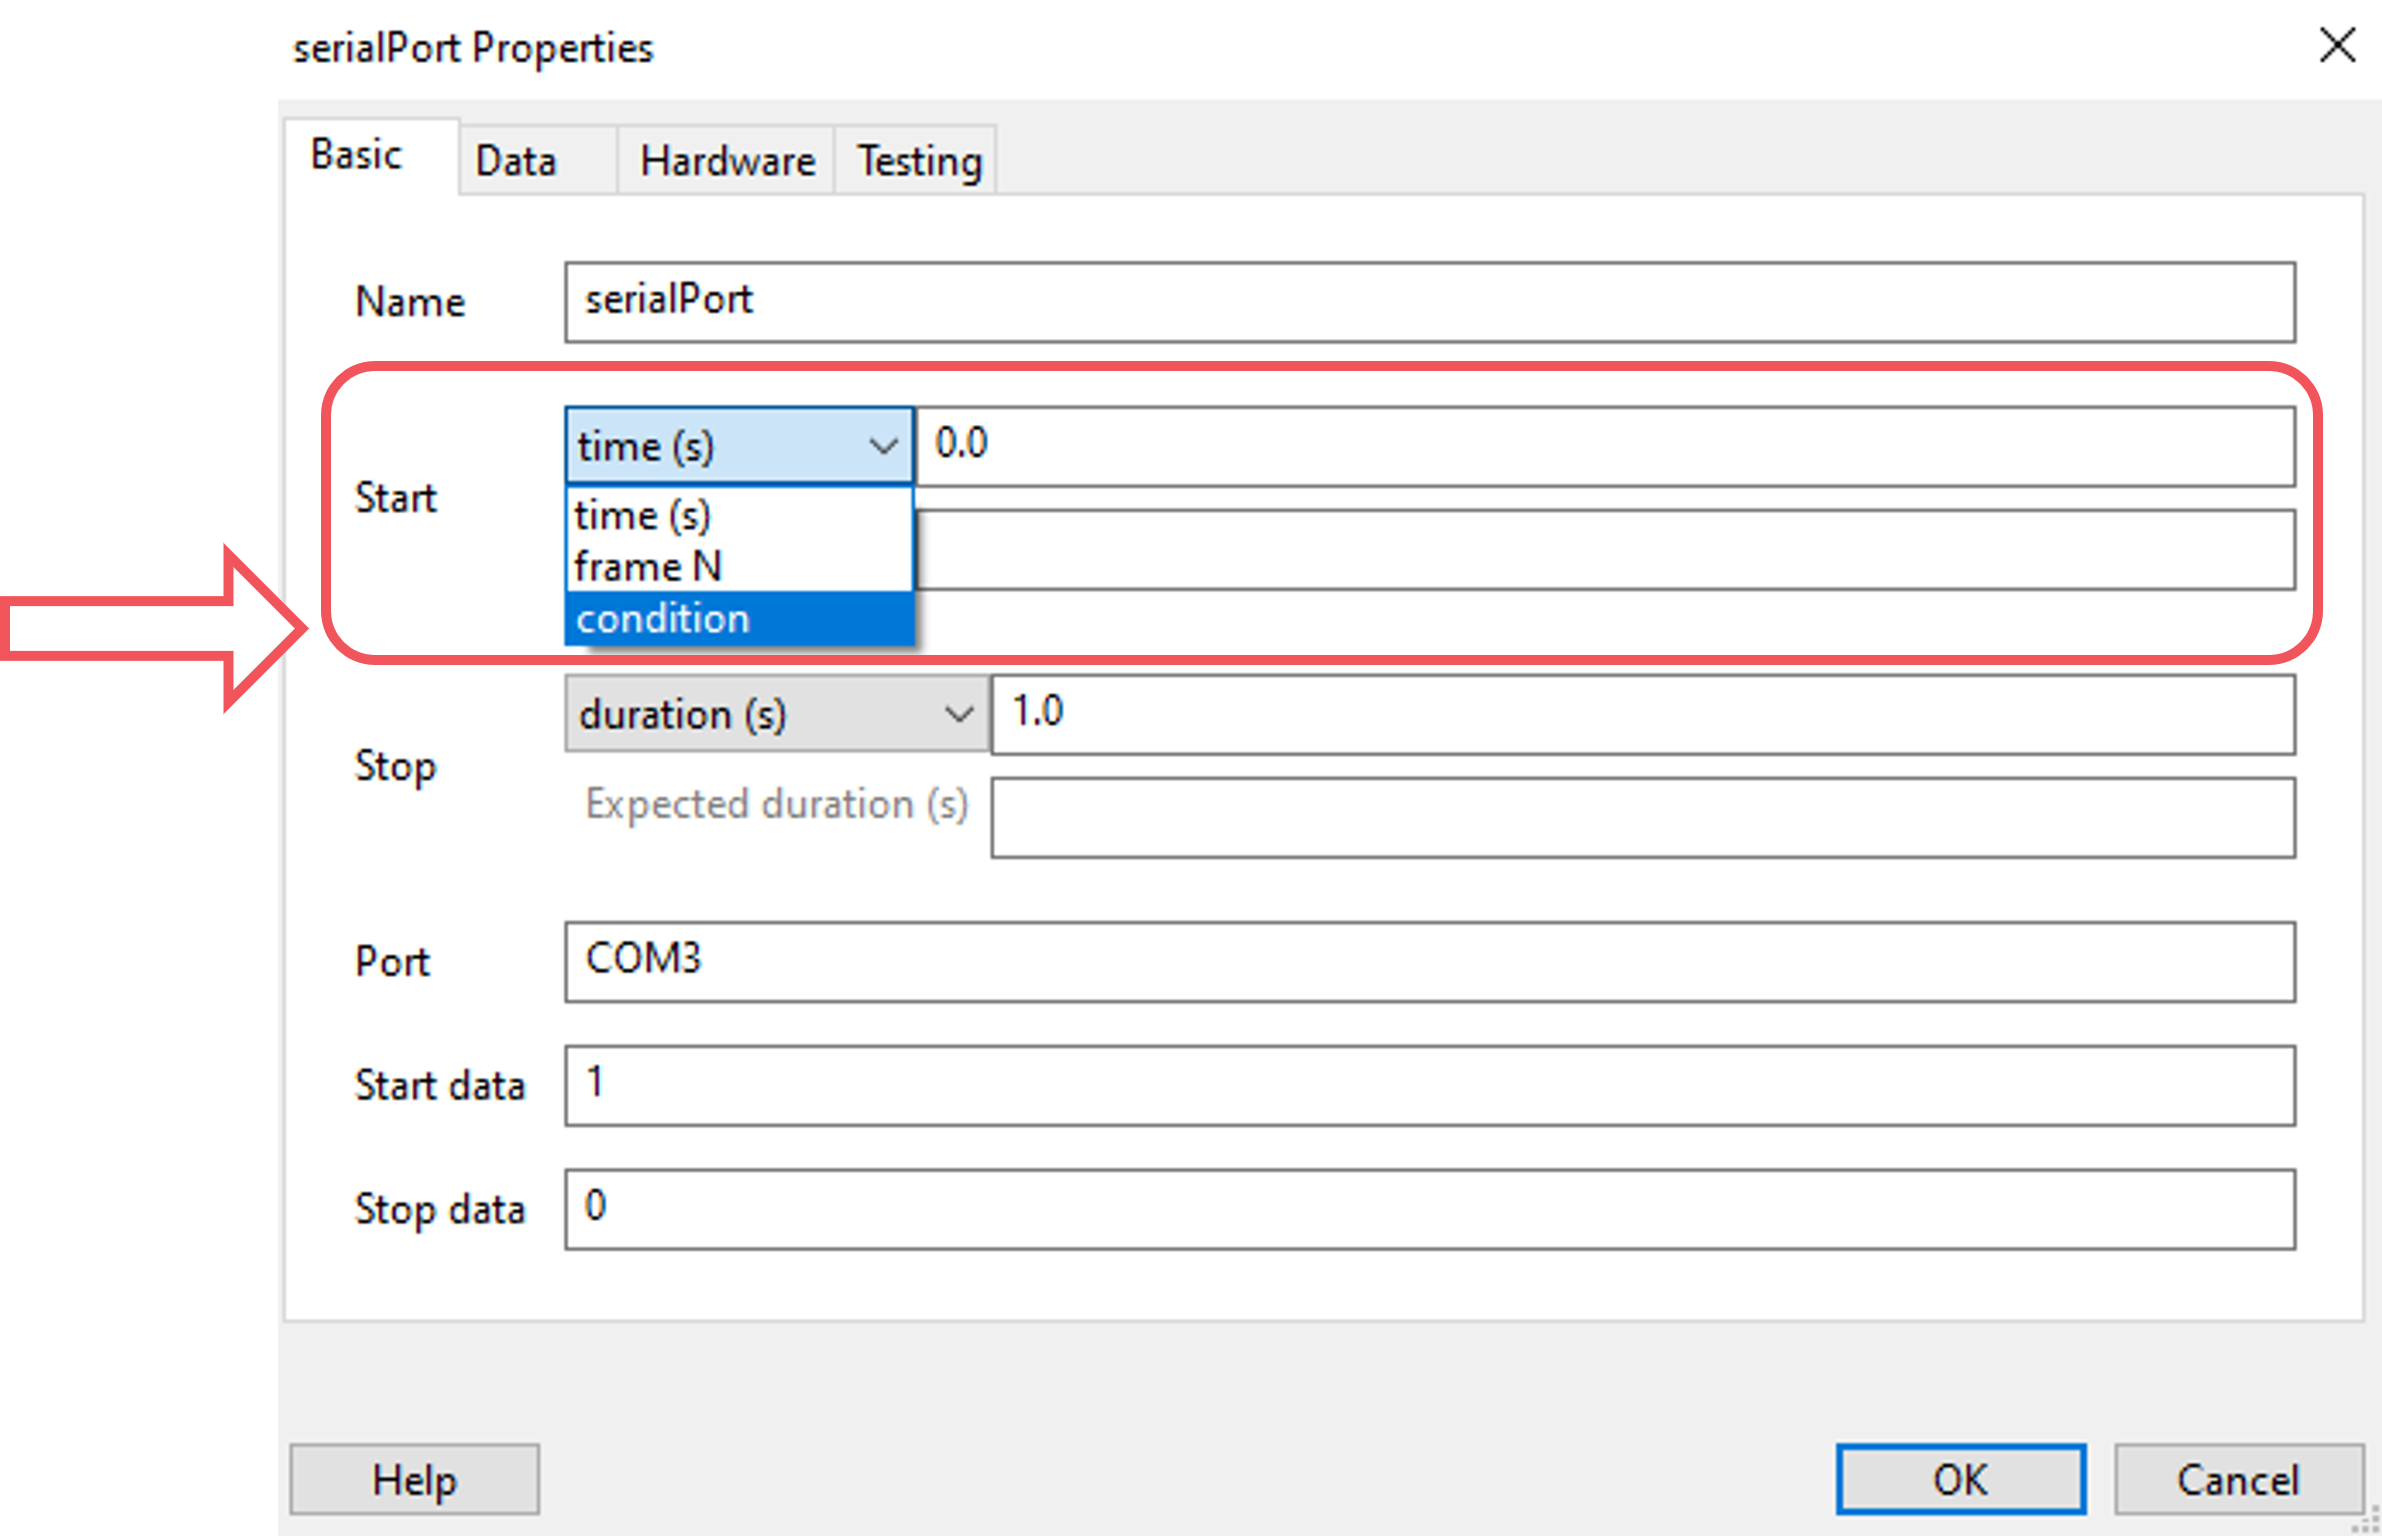
Fig. 36 In the Basic tab, we’ll choose to start our trigger when a condition is met by selecting condition from the Start drop down.
Now we set that condition by inserting the following code:
stimulus.status == STARTED #Change 'stimulus' here to match the name of your own component
Next, we need to set the address of the serial port that we want to use. To do this, write the address of the port in the Port field:
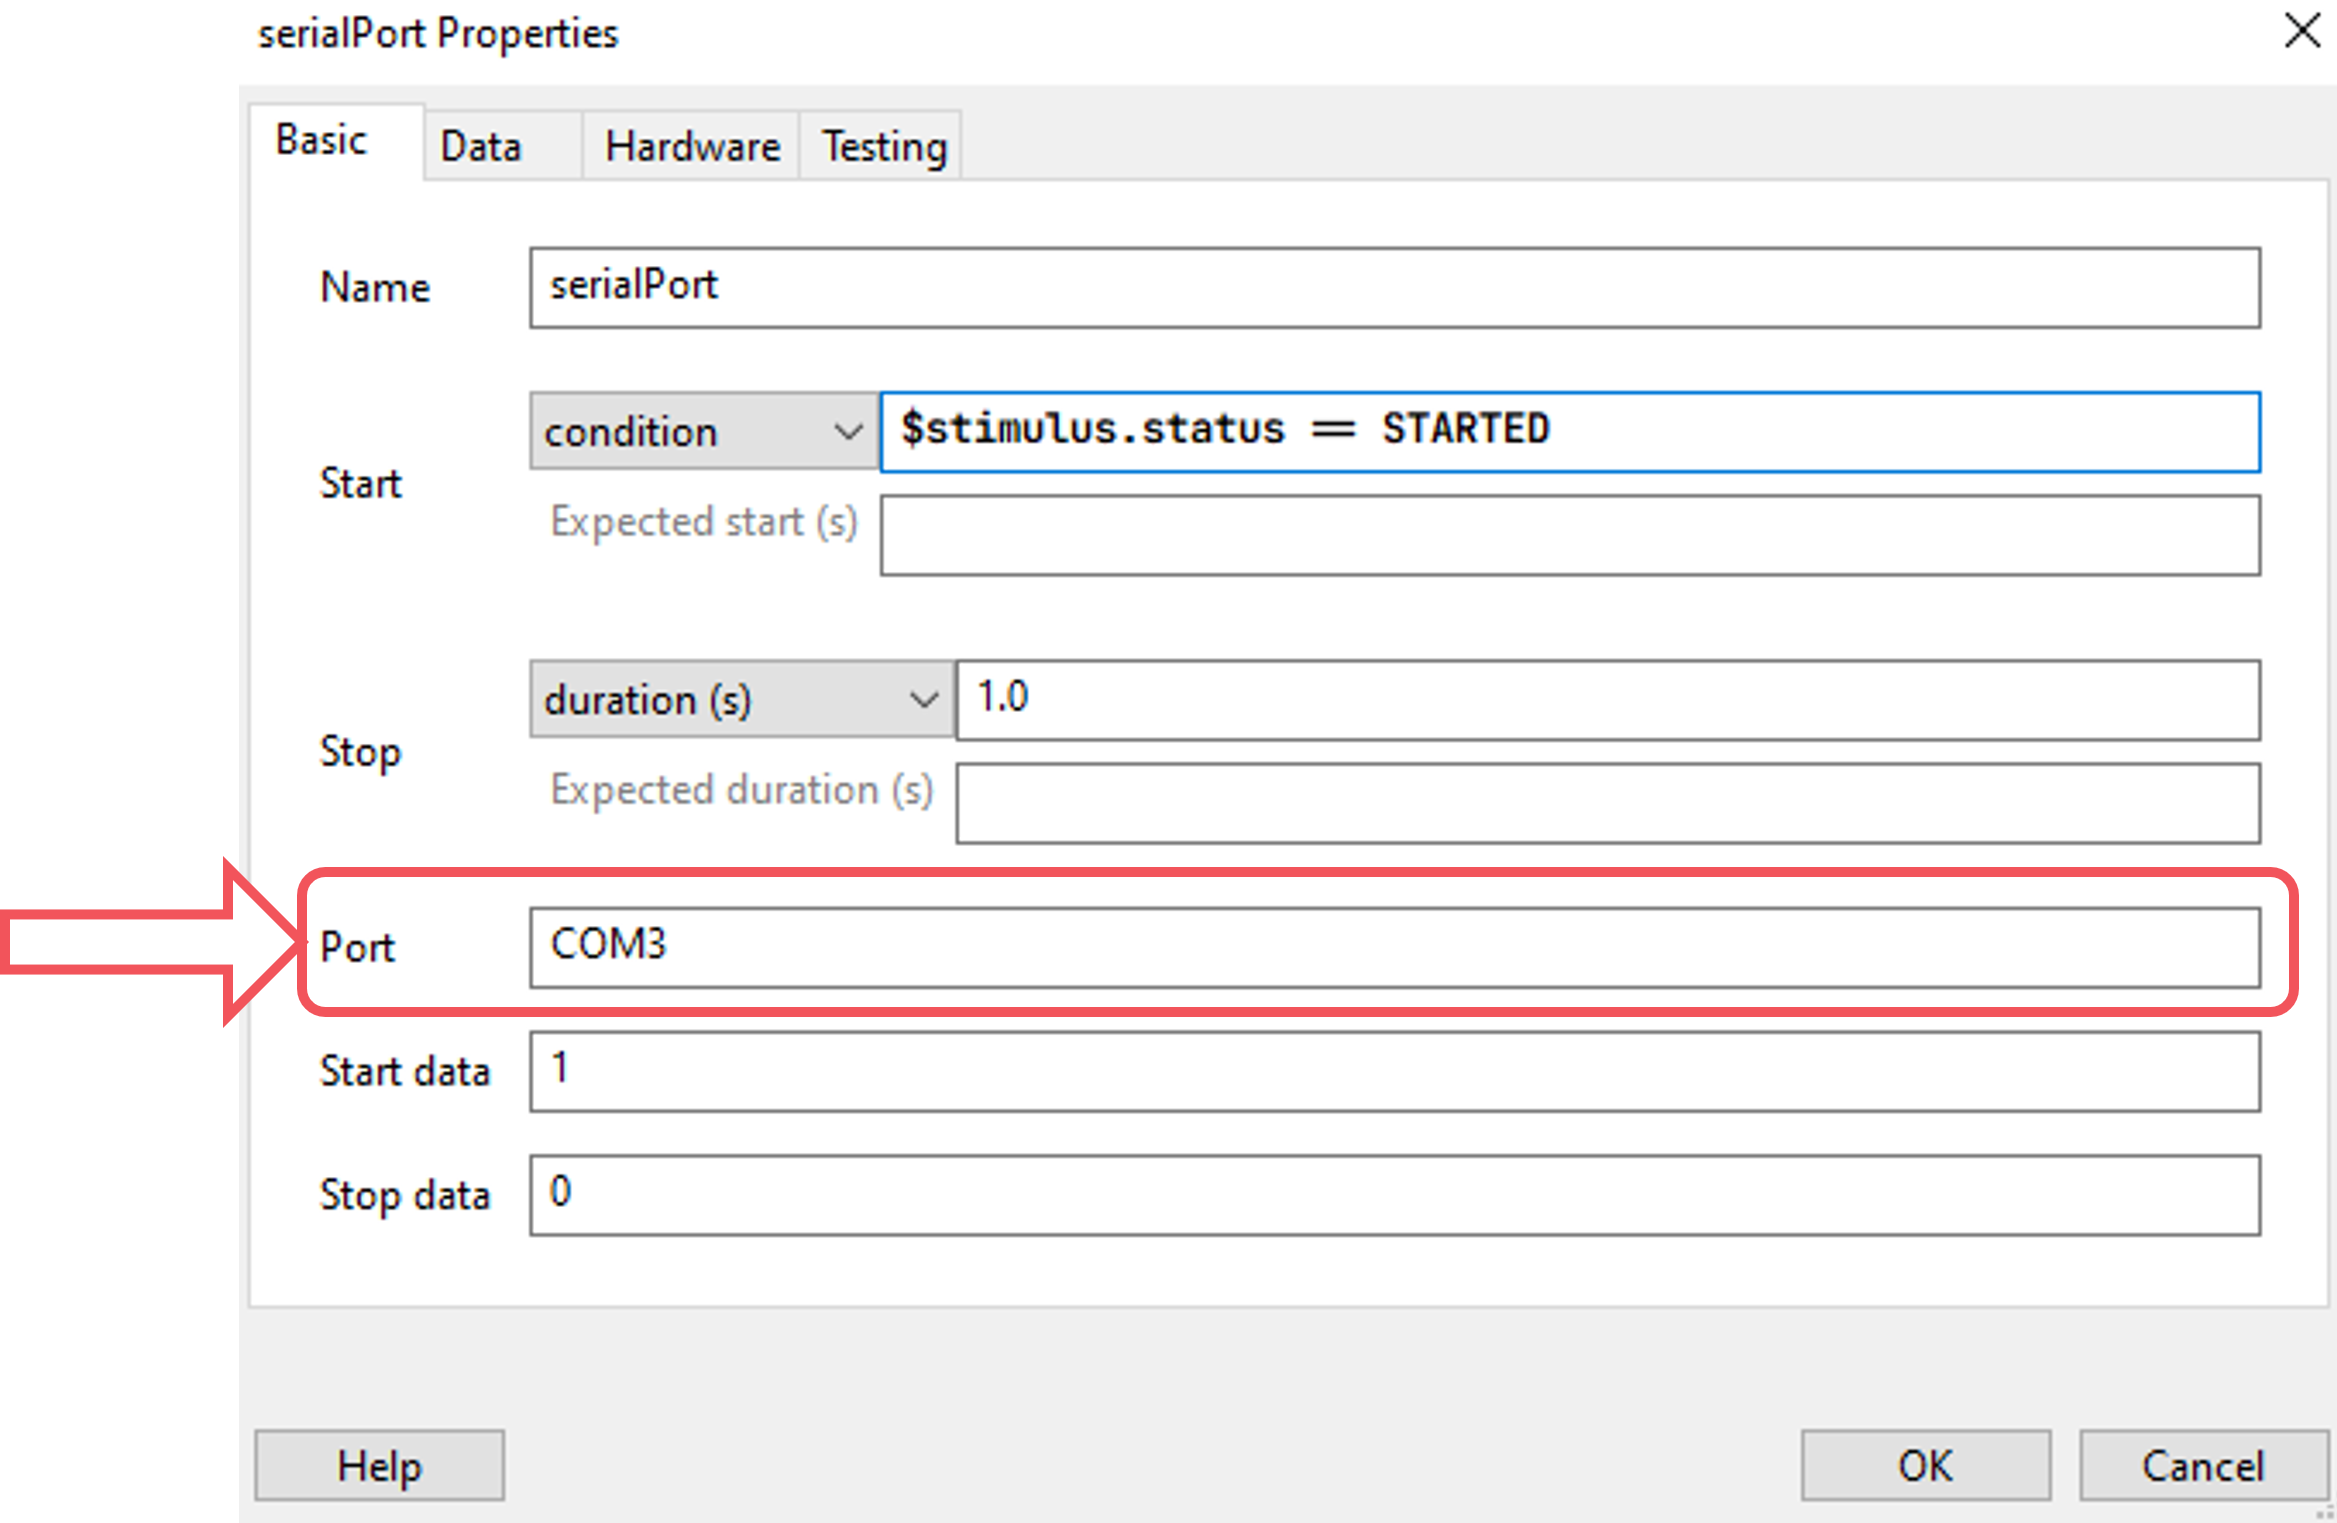
Fig. 37 Type in the address of your serial port.
Next, we’ll set the data that we’d like to send to the device at the start of the pulse, and what we want it to be reset to at the end of the pulse. Do this by completing the Start data and Stop data fields:
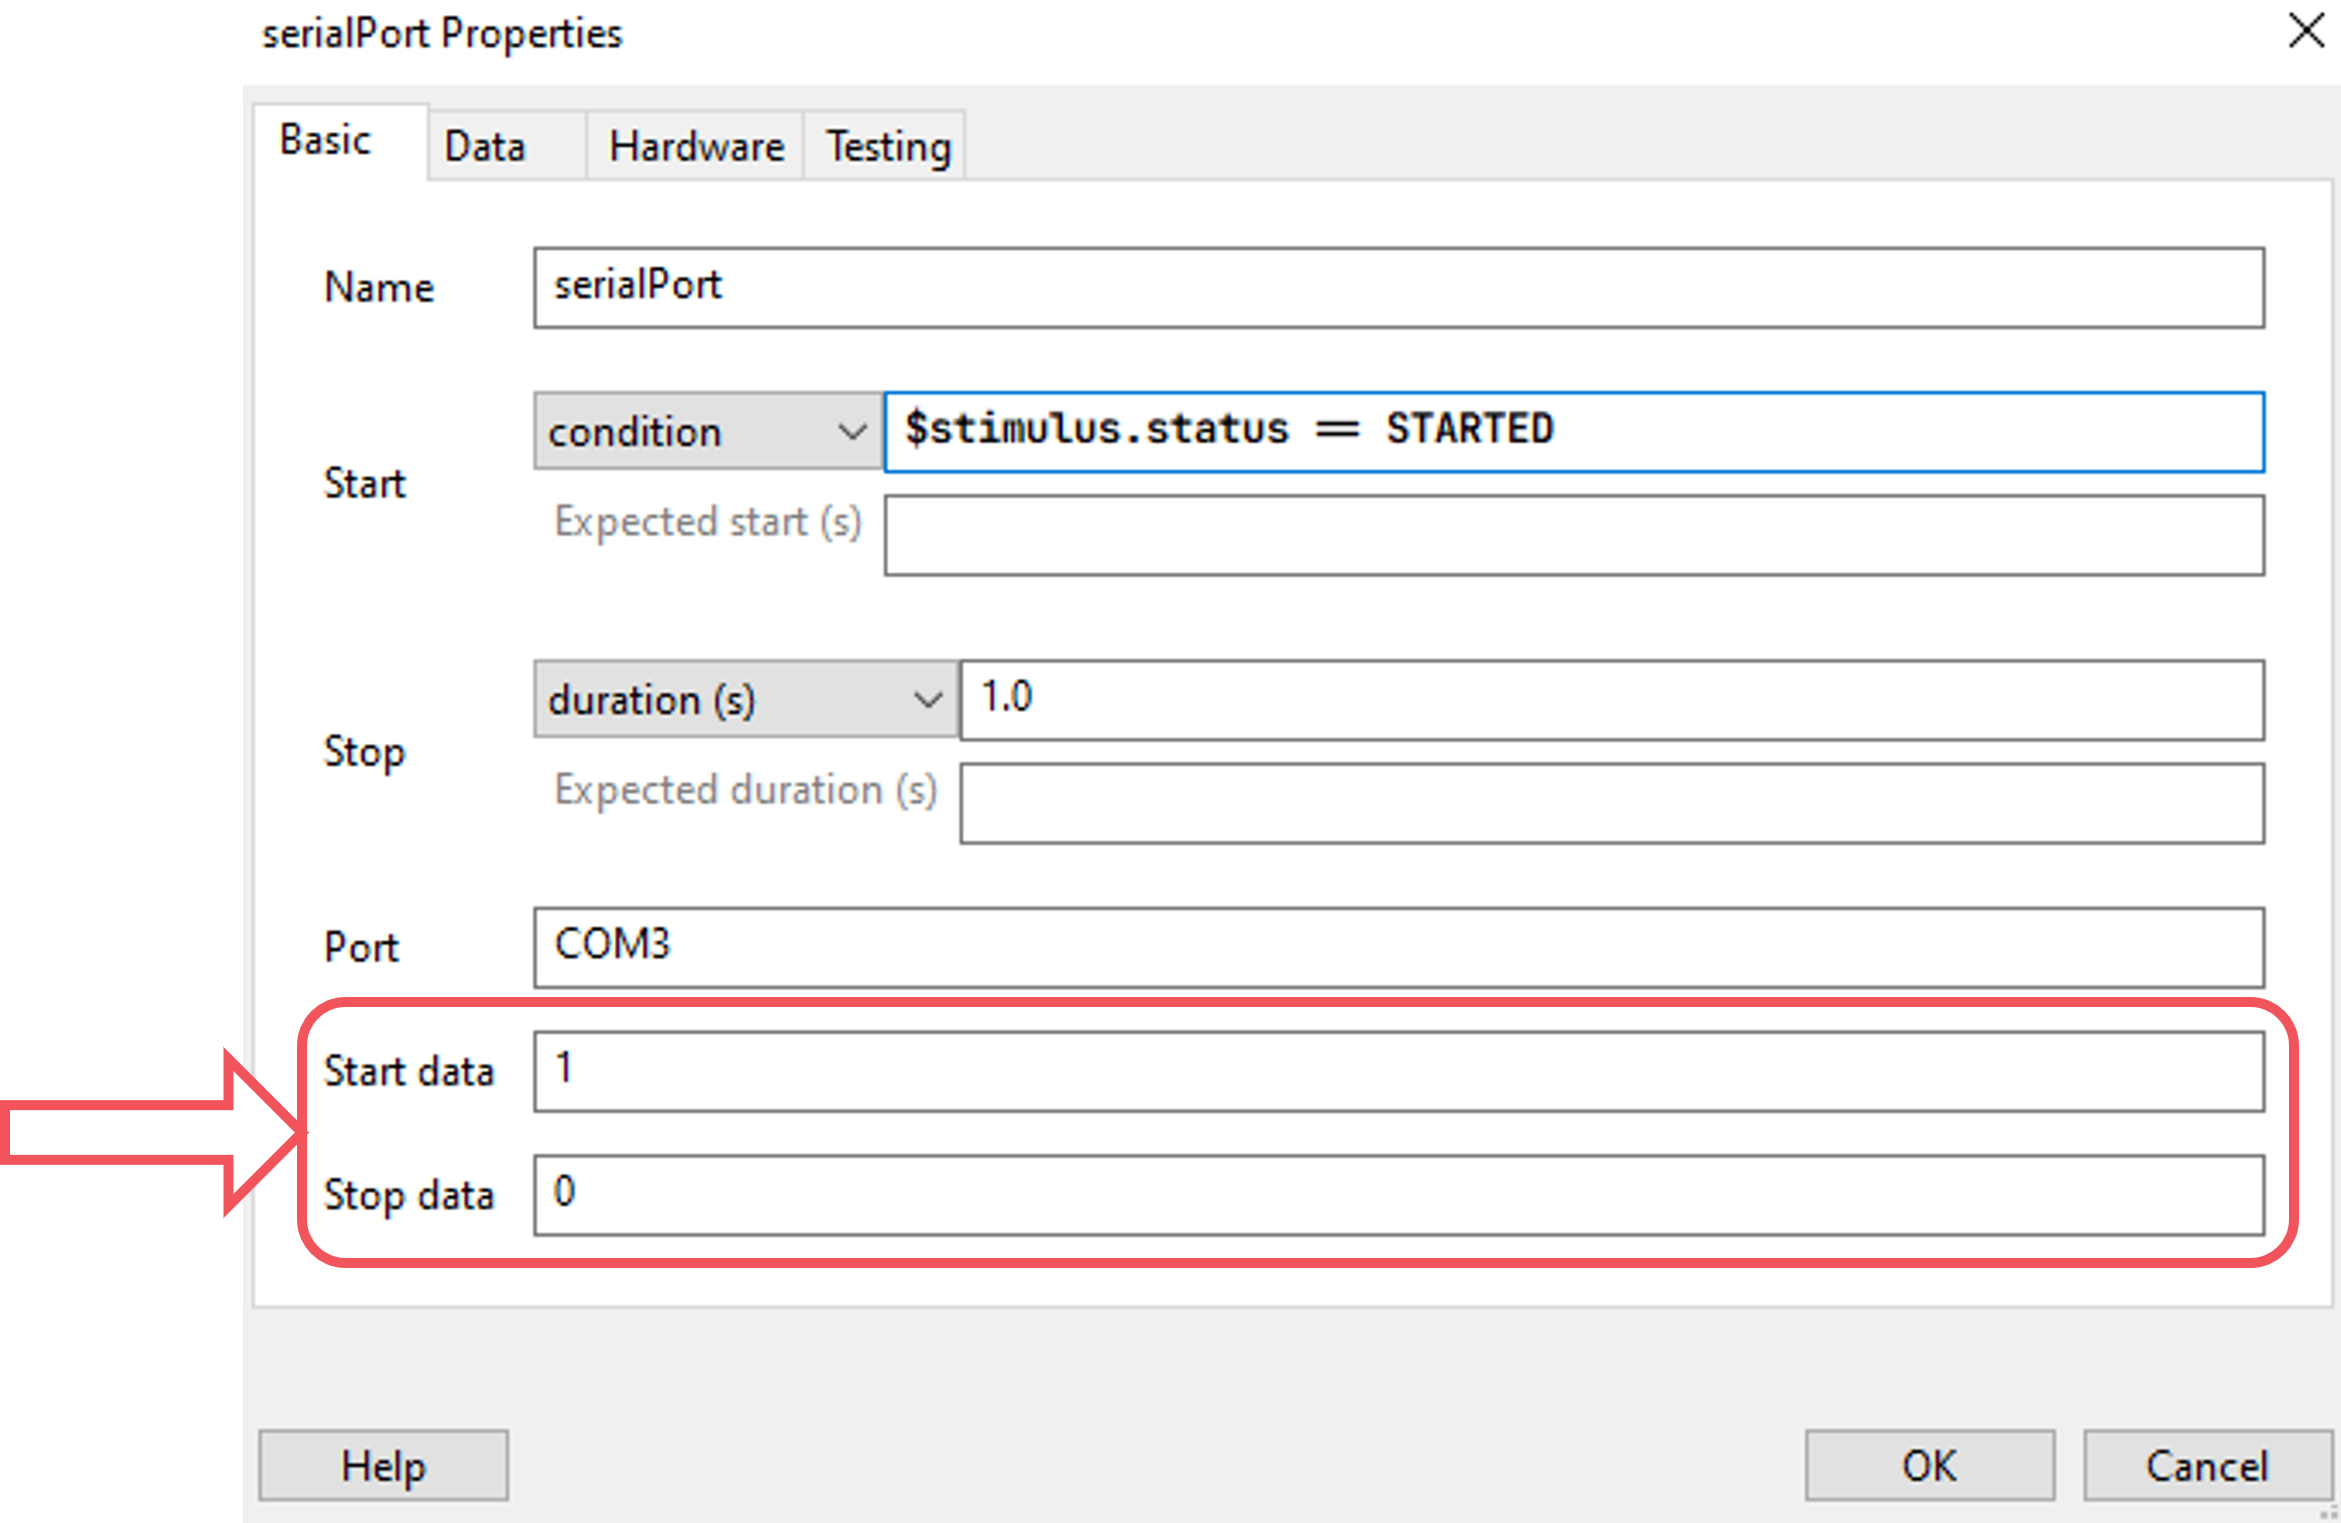
Fig. 38 What do you want PsychoPy to send at the start of your trigger pulse, and what do you want it to be reset to at the end of the pulse?
By default, any integers that you type in these fields will be converted to characters. So the integer 1 will be converted to the character “1”. If you want to send the number 1, enter the following into the Start/Stop data fields:
chr(1) # Where 1 is the integer you want to send
You can also reference a variable from your conditions file in the Start/Stop data fields using
$, as long as those variables are strings.Now that your serial port component is set up, we now recommend that you :ref: test your triggers <trigger_test>.
Using a Code Component to communicate via Serial Port
First, add in a code component to your Instructions routine (or something similar, at the start of your experiment):

Fig. 39 Select the Code component from the Custom component drop-down
In the Begin Experiment tab, copy and paste the following code which will import the serial library and initiate PsychoPy’s communication with your serial port - be sure to change
COM3to the correct serial port address for your device:import serial #Import the serial library port = serial.Serial('COM3') #Change 'COM3' here to your serial port address
Now, copy and paste the following code component to your trials routine in the Begin Routine tab (or whichever routine you want to send triggers from):
stimulus_pulse_started = False
stimulus_pulse_ended = False
In the same routine, copy and paste the following code in the Each Frame tab - be sure to change stimulus in line 1 to match the name of the component that you want to send the triggers for:
if stimulus.status == STARTED and not stimulus_pulse_started: #Change 'stimulus' to match the name of the component that you want to send the trigger for
    win.callOnFlip(port.write, str.encode('1'))
    stimulus_pulse_start_time = globalClock.getTime()
    stimulus_pulse_started  = True

if stimulus_pulse_started and not stimulus_pulse_ended:
        if globalClock.getTime() - stimulus_pulse_start_time >= 0.005:
            win.callOnFlip(port.write,  str.encode('0'))
            stimulus_pulse_ended = True
This code will send a ‘1’ to your device at the onset of the stimulus component, and then reset back to ‘0’. You can change these values to whatever is meaningful to your data, including asking PsychoPy to pull the value from your conditions file.
Finally, in a routine at the end of your experiment (the Thanks for participating screen for example) copy and paste the following:
port.close()
We now recommend that you :ref: test your triggers <trigger_test>.
Test your triggers
To check that everything works, we recommend that you set up a very basic experiment that looks similar to this:
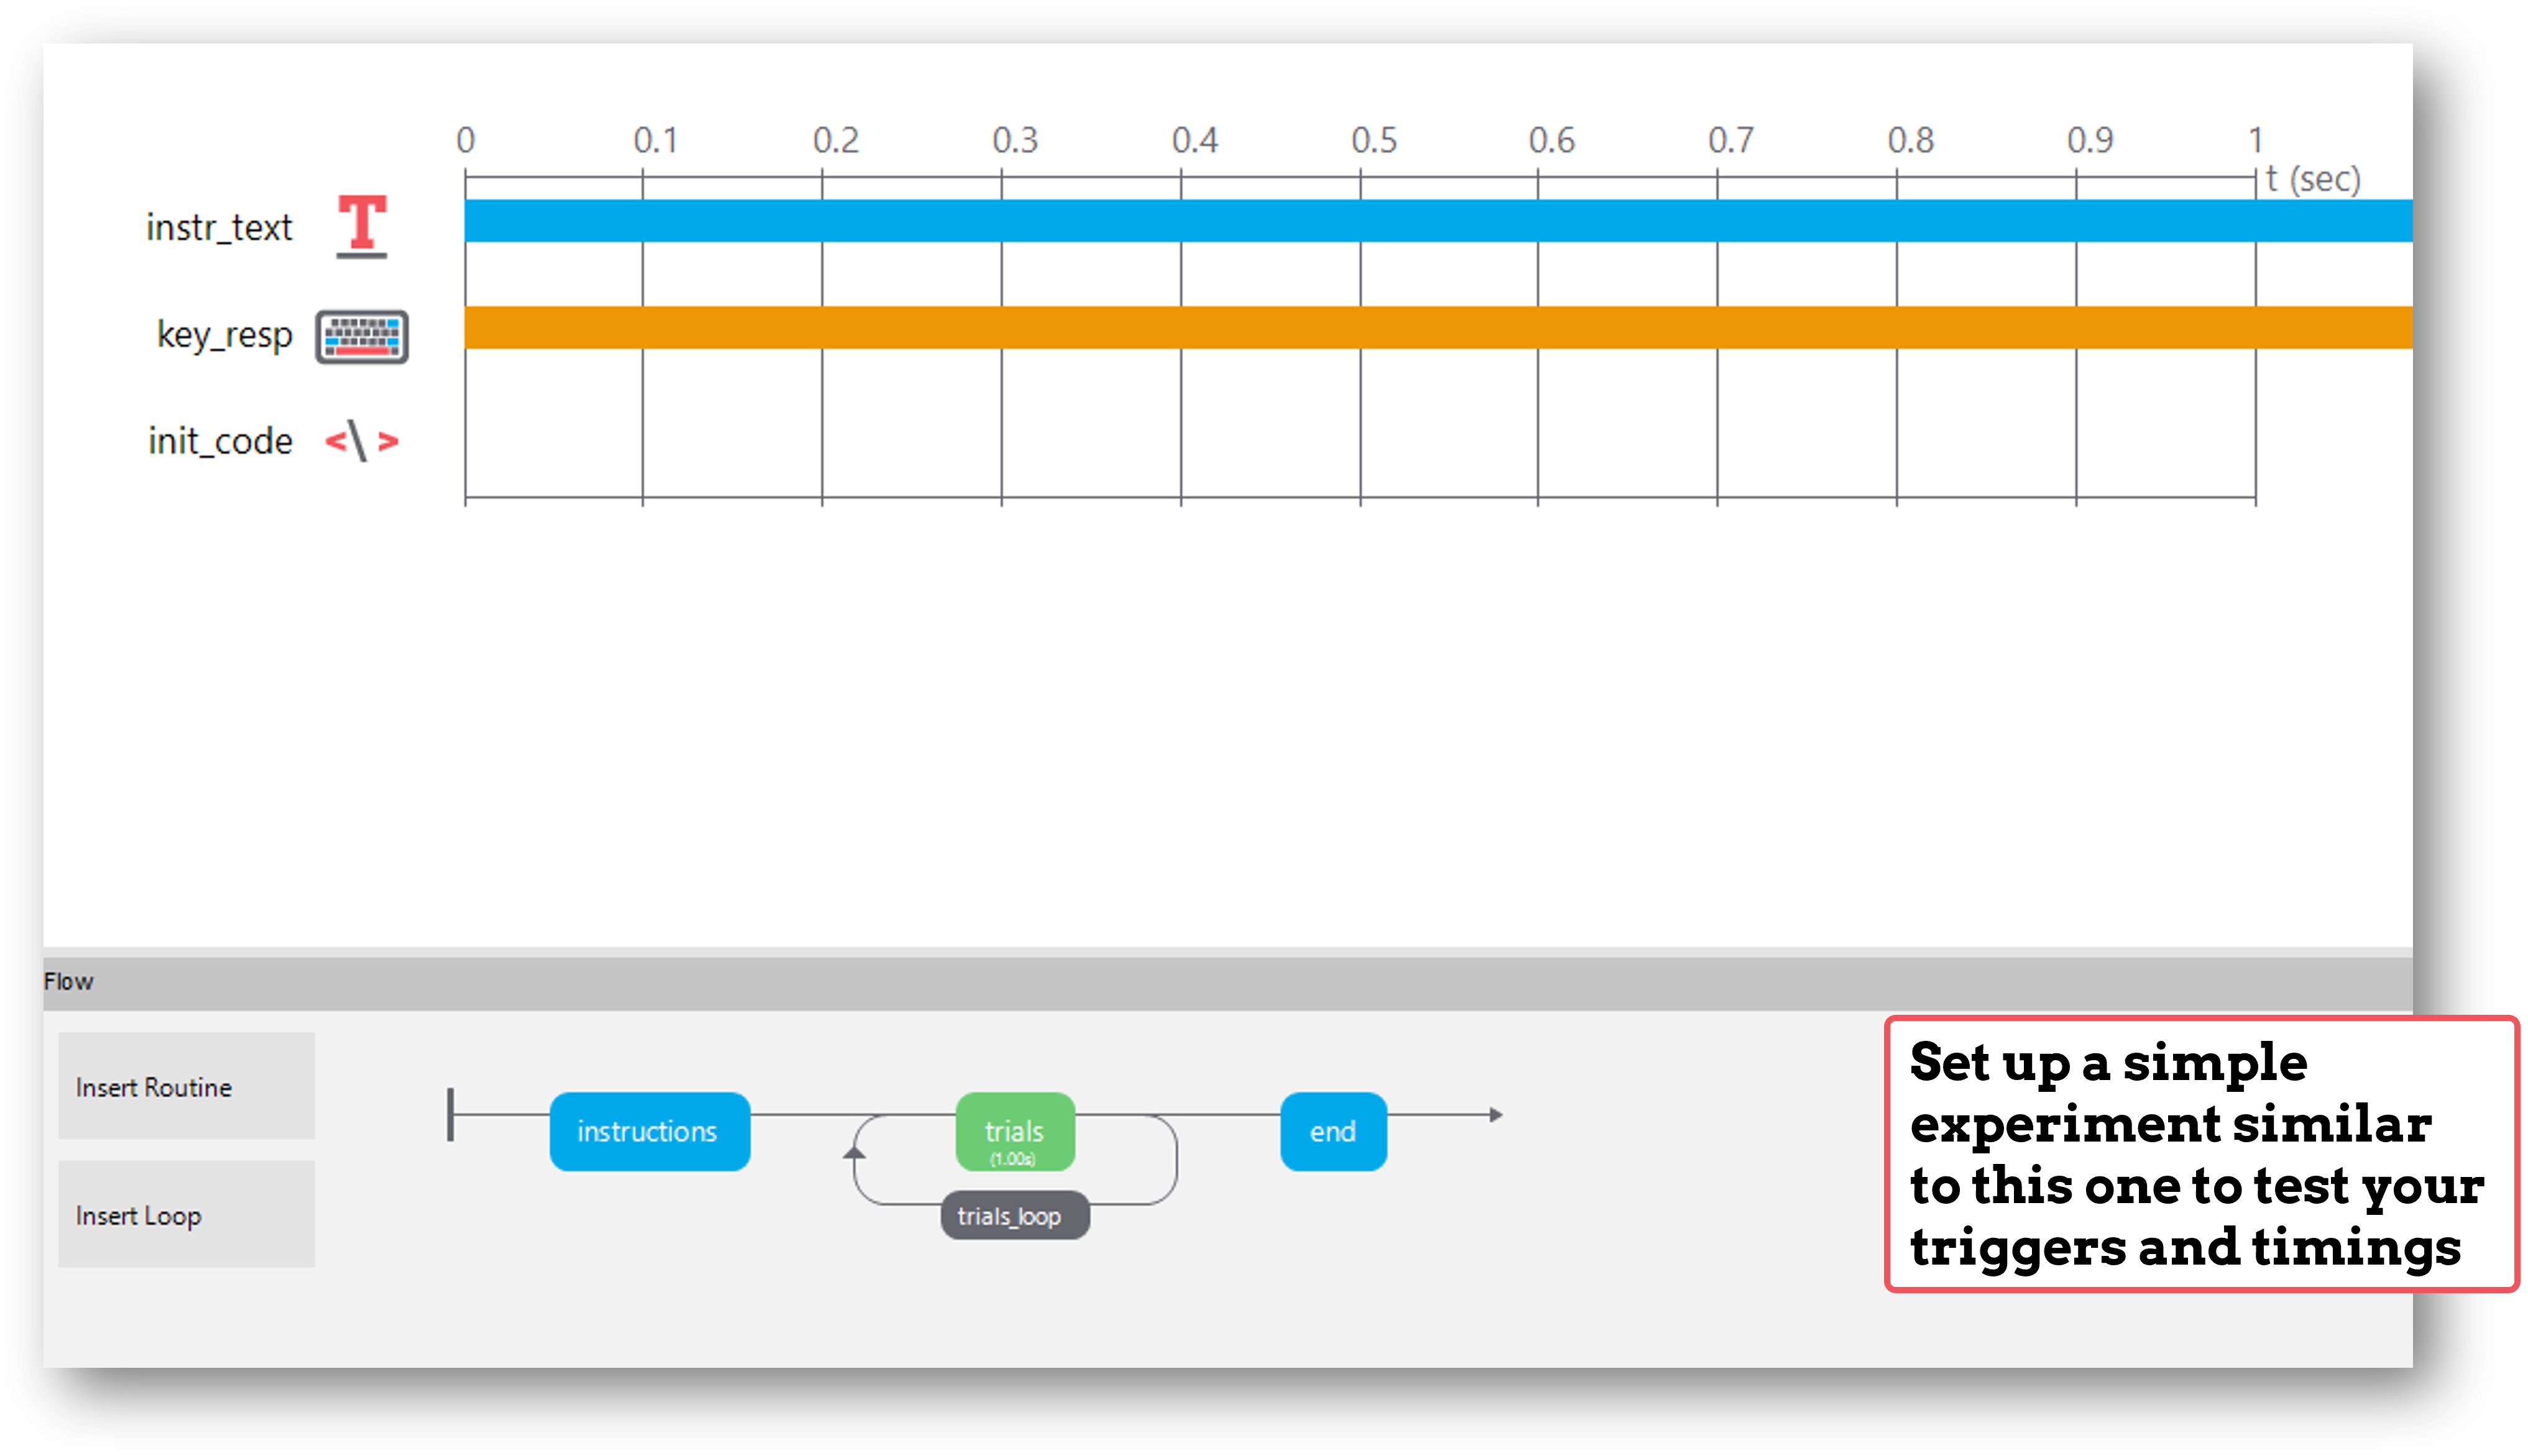
Turn on your EEG recording device and start recording as you would in your actual experiment, and just check that you see triggers coming through.
It’s a good idea at this point to also check the timing of your stimulus presentation and your triggers using, for example, a photodiode for visual stimuli.
Doing these checks with a very basic experiment just means that you don’t accidentally change something on your real experiment file that you don’t want to, and also means you don’t have to disable components or sit through lots of instructions etc!
If there is a problem - We want to know!
If you have followed the steps above and are having an issue with triggers, please post details of this on the PsychoPy Forum.
We are constantly looking to update our documentation so that it’s easy for you to use PsychoPy in the way that you want to. Posting in our forum allows us to see what issues users are having, offer solutions, and to update our documentation to hopefully prevent those issues from occurring again!