
Recording information from an Arduino via serial port
Arduino microcontrollers are a relatively cost-effective way to record biophysical responses to stimuli, such as galvanic skin response (GSR) or heart rate. This page will guide you through how to record information from an Arduino via a serial port connection.
This guide will cover how to set up your PsychoPy experiment only - for lots of tutorials on using your Arduino, and also how to download the open-source Arduino software, take a look at the Arduino website.
Step one: Find out the address of your serial port
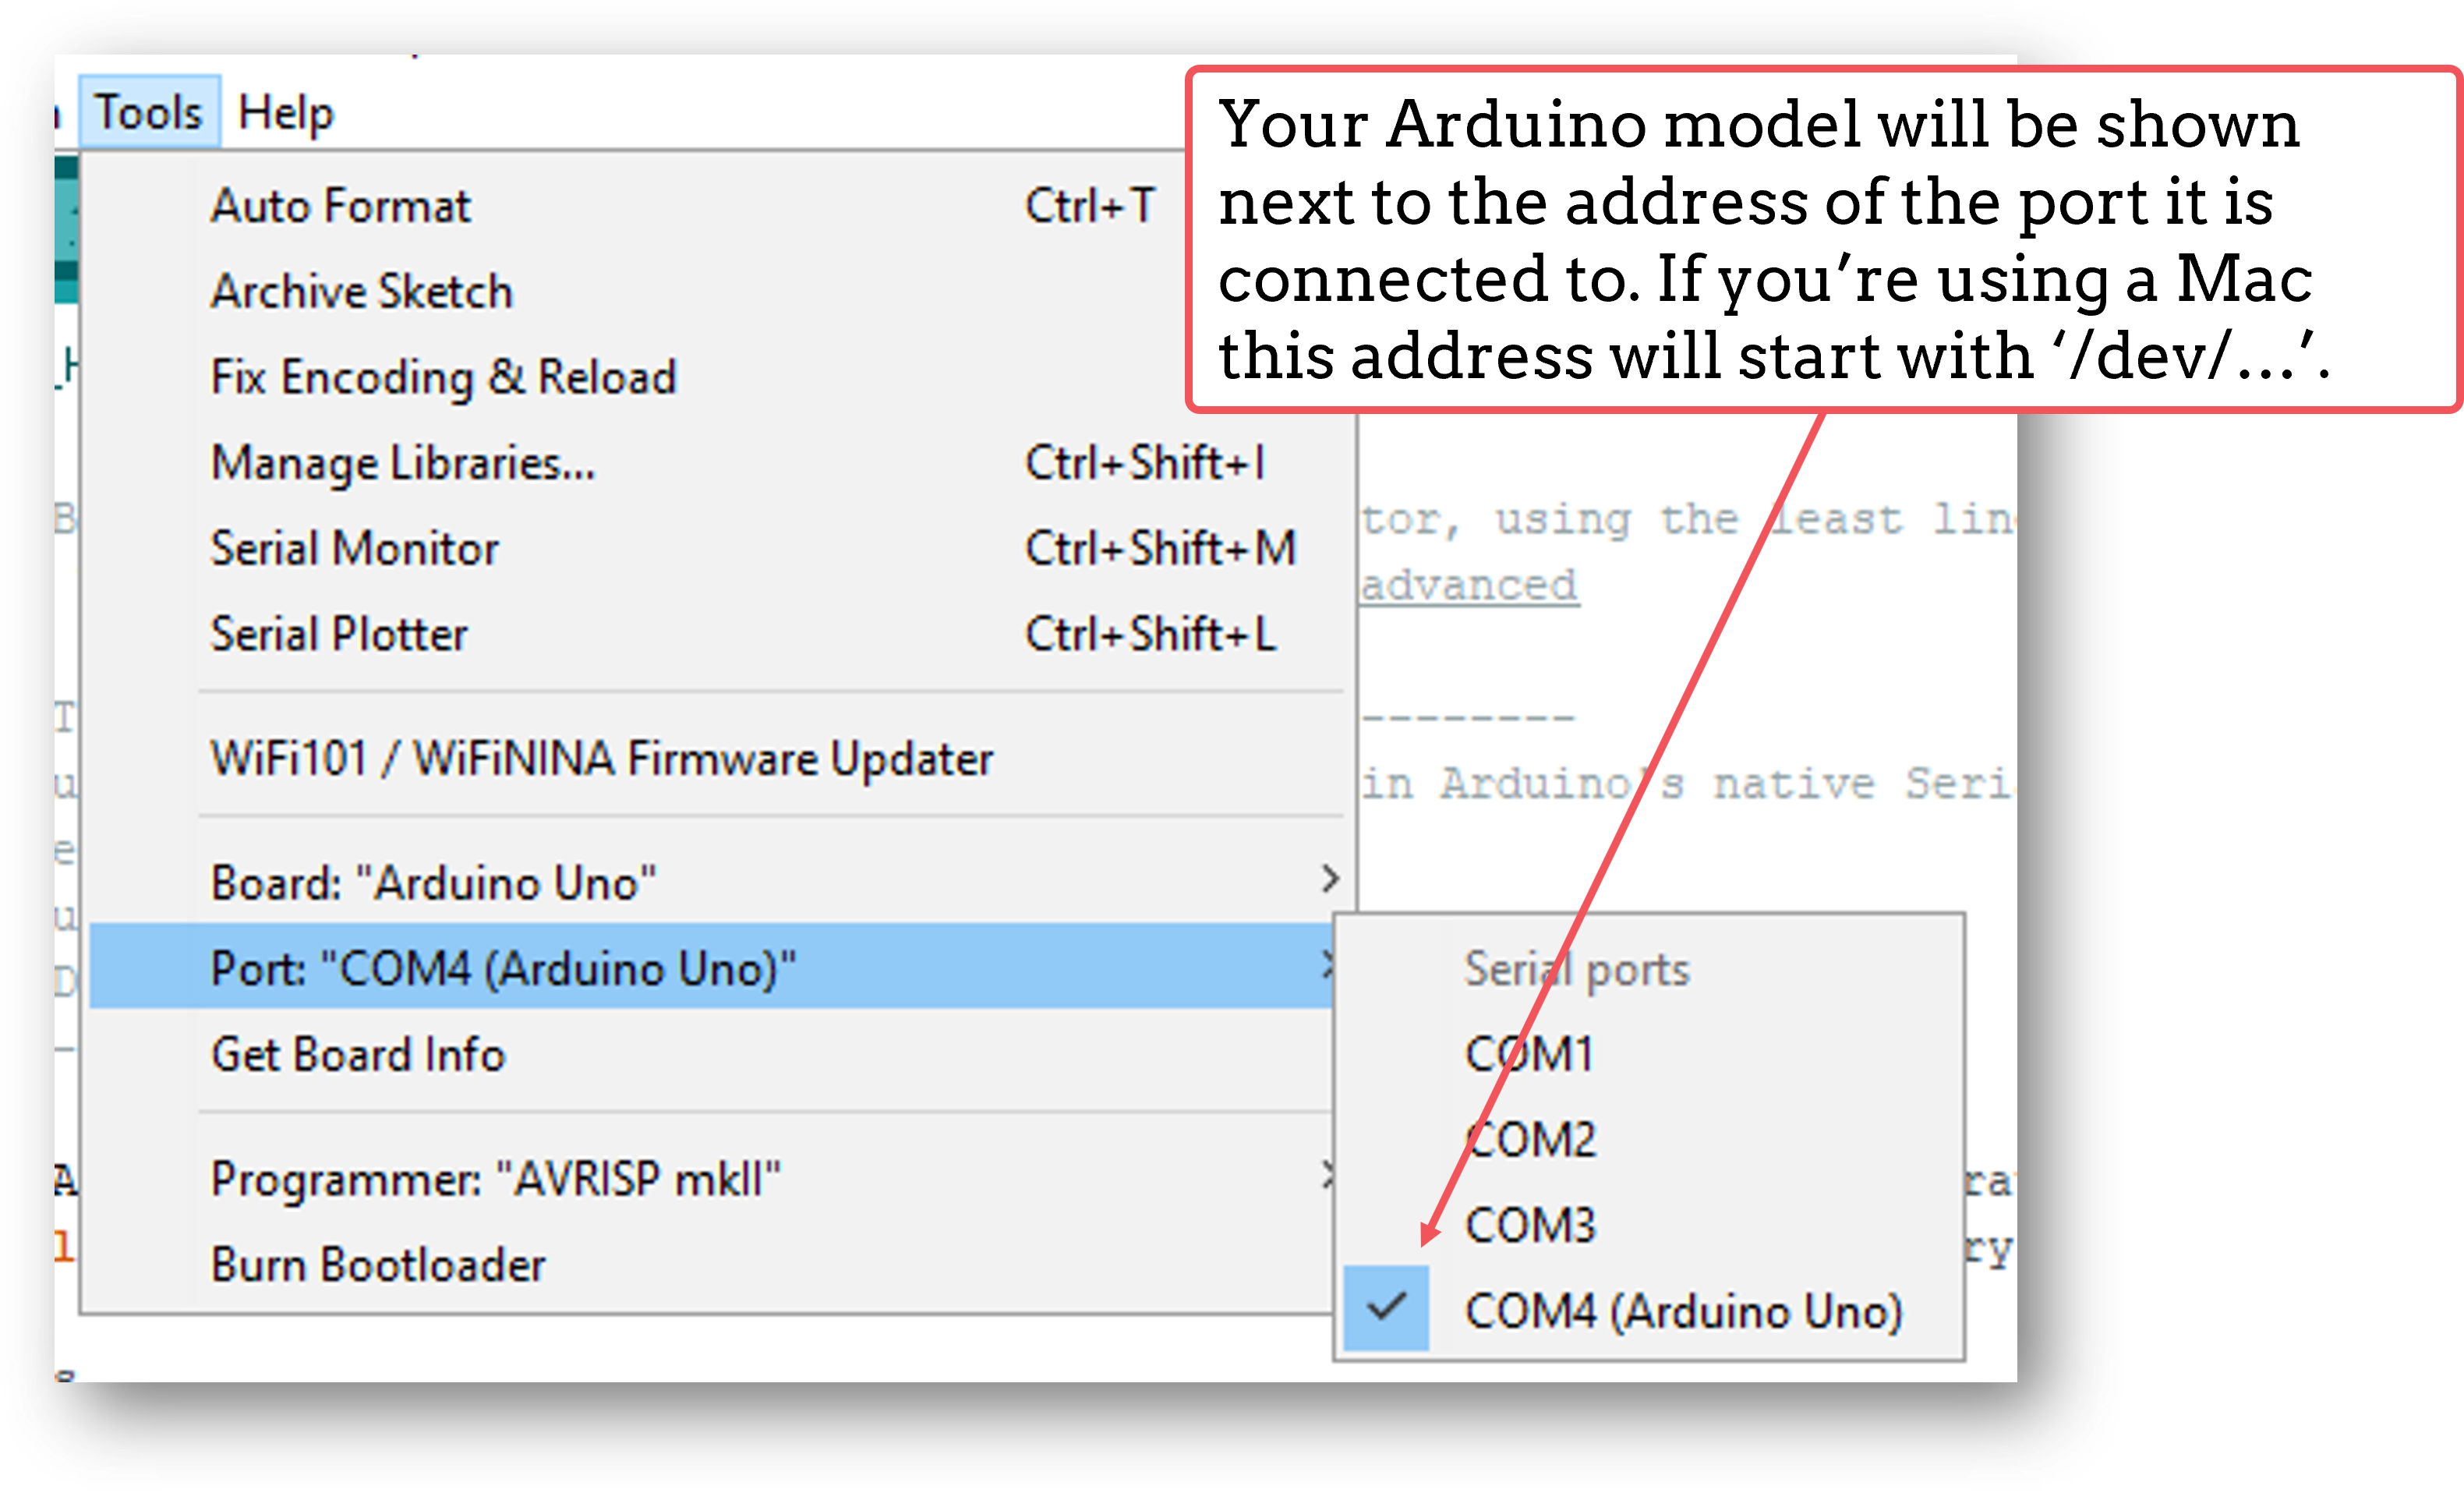
You can quickly find out the address of the serial port that your Arduino is connected to by opening the Arduino IDE and clicking on Tools at the top of the window, then down to Port. Here, the port that your Arduino is connected to will show the model of your Arduino next to it.
Step two: Add code components to your Builder experiment
Let’s assume for this tutorial that we have a basic experiment set up where we are presenting an image stimulus to a participant, and we want to record their heart rate, via a module connected to an Arduino, during viewing.
The first thing we’ll need to do is initiate the communication between PsychoPy and the Arduino. We do this by adding in a code component to a routine at the start of the experiment (such as an instructions routine).
In the Begin Experiment tab of that code component, add the following code to import the necessary libraries:
import serial
import time
Then in that same code component, in the End Routine tab, we’re going to add in code to start the communication between PsychoPy and Arduino. This will also initialise the Arduino:
port = serial.Serial('COM4', 9600) #Change 'COM4' here to the address of the serial port your Arduino is connected to. '9600' is the Baudrate, and this should be set to the same rate as that of your Arduino.
time.sleep(1) #Give the Arduino some time to wake up!
Next, we’ll add a code component to our trial routine. This component will record the information that the Arduino is sending over the serial port. We’ll add it here to record information on every frame when the stimulus is presented, as we want to know how the participant’s heart rate changes over the course of the stimulus.
In the Begin Routine tab of this code component, add the following code to set up a list in which you’ll record your data:
res = []
Then in the Each Frame tab of that same code component, add the following to get PsychoPy to read the information sent over the serial port by Arduino:
res.append(port.readline())
Now in the End Routine tab, we’re going to ask PsychoPy to save the data to our .csv data file. But in this case we want only the numbers that are sent. You might have noticed that Arduino sends things like ‘\n’ along with its data. This isn’t always helpful for analysis, so we’ll ask PsychoPy to ignore those values and save only a list of integers in our data file:
numbers = [] #Make a list to put the numbers only in

 for i, string in enumerate(res):
     for word in string.split():
         if word.isdigit():
             numbers.append(int(word))
 thisExp.addData('heart_rate', numbers) #Add the list to our data file - 'heart_rate' will be the name of this column in our .csv file.
Finally, we’re going to close the port when the experiment ends. To do this, add the following to the End Experiment tab of any code component:
port.close()
You should now have an experiment that reads and records the information being sent by an Arduino. Here we used heart rate as an example, but this code can easily be adapted to record any information that your Arduino is sending.
If there is a problem - We want to know!
If you have followed the steps above and are having an issue, please post details of this on the PsychoPy Forum.
We are constantly looking to update our documentation so that it’s easy for you to use PsychoPy in the way that you want to. Posting in our forum allows us to see what issues users are having, offer solutions, and to update our documentation to hopefully prevent those issues from occurring again!